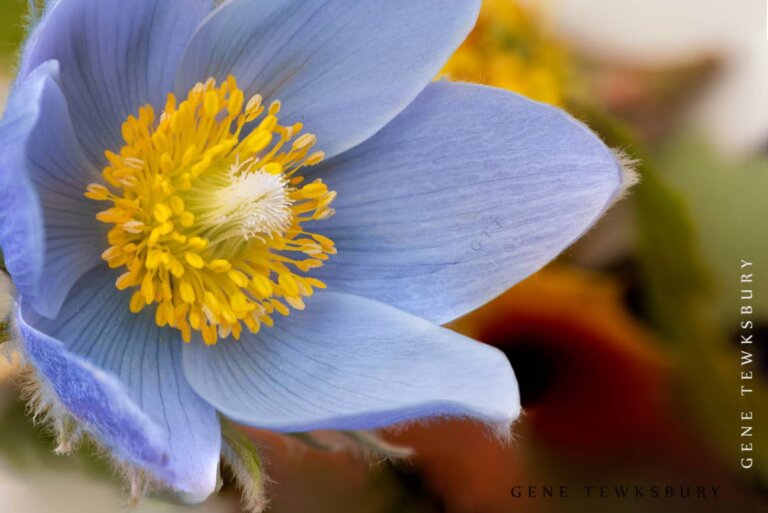
Are you looking to get involved in the world of Macro Photography? There is a lot of good reasons to try. For starters it is just great fun and can be done anywhere you live. Literally anywhere from the tundras of Alaska to the deserts of Chili to the sidewalks of the Bronx. Once you start to look at the tiny world below your feet you’ll find there is life and color and intrigue teaming through every inch of this planet.
Before you can get started however, you will need a few equipment items specific for macro photography. There are a lot of options out there, but what do you really need? What can you do without? What should you consider when trying to select a piece of macro equipment? The following outline should give you a great starting point when making these decisions.
Before moving on: Are you interested in taking a Macro Photography workshop where you can learn to put your equipment to use? Check out my upcoming Macro Photography workshop this summer:
[Denver Area Macro Photography Workshop]
If you cannot make that workshop I will also be teaching macro photography at this years Colorado Photography Festival.
[Colorado Photography Festival]
Macro Lens Options:
- Macro (Nikon uses the term “micro”) Lens:
- Provides 1:1 image / sensor magnification or better.
- Advantages
- Best image quality.
- Ease of use.
- Disadvantages
- Price
- Weight
- Things to Consider
- “Working Distance” – the distance from the front of your lens to the subject where you reach 1:1 magnification.
- Short working distance can cause blocking of light, no room for light modification, less comfortable shooting positions for photographer and more likely to disturb skittish subjects.
- Generally longer focal lengths provide more working distance at the same magnification.
- Minimum focus distance – the distance from the subject to your sensor. From a practical sense working distance is what you are concerned with.
- VR(vibration reduction technology) can be quite useful as vibration becomes more noticeable as your magnification increases.
- Internal focus vs Tube extension: Does the lens stay fixed position or move forward as your focus. Lenses which extend to focus can be troublesome in close distances.
- “Working Distance” – the distance from the front of your lens to the subject where you reach 1:1 magnification.
- Advantages
- Provides 1:1 image / sensor magnification or better.
- Extension Tubes:
- Adds distance between the lens and the sensor. This decreases your minimum focus distance, thus having the effect of increased magnification.
- Advantages
- No effect on optics as the tubes have no glass in them.
- Can be stacked on top of each other for greater magnification.
- Can be combined with macro lens for higher magnification.
- Disadvantages
- Reduces the amount of light reaching the camera sensor, thus requiring faster shutter speed and/or limiting aperture options.
- Can be cumbersome swapping out tubes in the field.
- You will lose camera functions like auto-focus and aperture control unless you purchase tubes with special connectors suitable for your camera and lens.
- To set aperture without a manual aperture ring (or tube with electronic connections) – put your lens on the camera without extension tubes > set your aperture to desired f/stop > press DOF preview (this will stop down the aperture) > remove lens while DOF preview button is depressed > the lens is now left at the desired aperture and you can now attach to your camera with the extension tubes attached. This method may vary on different cameras.
- Reduces your working distance (thus harder to work with skittish creatures and harder to manipulate lighting as there is less room to work).
- Lens will lose ability to focus at normal distances.
- Things to Consider
- Cheap tubes may not be stable.
- It is really worth getting tubes with the camera connections. Not so much for auto-focus (as generally it’s best to focus manually for macro) but for the aperture (especially for modern lenses that do not even have an aperture ring on them).
- Magnification Increase can be determined: (length of the extension tubes in mm – divided by – focal length of the lens in mm ). For Total magnification simply add the base magnification of the lens (you will have to get that information from your manufacture but for average macro lens it will be 1:1). This equation will vary lens to lens based on it’s native extension.
- Advantages
- Adds distance between the lens and the sensor. This decreases your minimum focus distance, thus having the effect of increased magnification.
- Teleconverters:
- Changes the focal length of a lens through optics. This does not change the minimum focus distance, but instead the magnification.
- Advantages
- Can be used with any lens that has your camera’s mount.
- Can be used with your macro lens to help increase working distance (ie: 2X magnification would allow me to be 2X further from the subject and get the same sized image, thus increasing working distance, or double my magnification at normal working distance.
- Disadvantages
- Reduces the amount of light entering the camera, thus requiring increased shutter speed and/or limiting aperture options. This can also result in loss of AF ability at smaller apertures.
- Uses glass optics, thus a poor quality teleconverter will reduce the overall quality of the image.
- Some lenses will contact the element of a teleconverter, thus causing damage. Check closely with manufactures before purchasing.
- Nikon: http://www.nikonusa.com/en_US/IMG/Images/Learn-Explore/Photography-Techniques/2012/Teleconverters-Freeman-Alberhasky/Media/en_US_Comp_chart.html
- Advantages
- Changes the focal length of a lens through optics. This does not change the minimum focus distance, but instead the magnification.
- Reversed Lens:
- Using a special adapter you can mount your standard lens backward on the camera creating a much higher magnification.
- Advantages
- Very cheap option.
- Light and small.
- Disadvantages
- You will lose all electronic functions (including auto-focus and aperture control in modern lenses).
- To set aperture without a manual aperture ring – put your lens on the camera > set your aperture to desired f/stop > press DOF preview (this will stop down the aperture) > remove lens while DOF preview button is depressed > the lens is now left at the desired aperture and you can now attach to your camera in reverse mode. This method may vary on different cameras.
- Things to Consider
- The wider angle the lens the more magnification you get in reverse.
- Advantages
- Using a special adapter you can mount your standard lens backward on the camera creating a much higher magnification.
- Bellows
- Accordion-like interface between camera and lens, increases distance of lens in the same way as extension tubes.
- Advantages
- Can acquire very high magnification.
- Variable extension allows for variable magnification.
- Disadvantages
- Loss of light entering camera requires longer shutter speeds and/or wider apertures.
- Loss of electronic connections, thus causing loss of auto-focus and aperture control on modern lenses. (note some bellows can be purchased with connections).
- Large and bulky. Not good for outdoor use.
- Reduces working distance.
- Minimal effect with telephoto lenses.
- Advantages
- Accordion-like interface between camera and lens, increases distance of lens in the same way as extension tubes.
- Closeup Lens (sometimes called diopter lens or close-up filter)
- Small lens (much like a filter) that screws to the front of your main lens. It shortens your working distance allow you to focus much closer and thus increase effective magnification.
- Advantages
- No light lost keeping the main lens’ original speed.
- Small, light and inexpensive.
- Can be used with wide angle close-up for more interesting perspective.
- Disadvantages
- Contain glass, thus cheap optics will reduce image quality.
- Can produce distortions.
- Because it works based on filter size, it will only fit specific sized lens.
- Advantages
- Small lens (much like a filter) that screws to the front of your main lens. It shortens your working distance allow you to focus much closer and thus increase effective magnification.
Required Macro Equipment
- Tripod
- Things to consider
- Ball head – inexpensive, easy to use and small.
- You MUST pay for quality for your head and get a head large enough for your camera and lens. If not, you will never maintain the critical fixed positions needed for macro.
- Gear head – more expensive, much larger and heavier. Has the advantage of precise movements in three planes and no “settling” of the camera.
- Tripods should have legs that extend to near 90 degrees allowing you to drop the tripod very close to the ground.
- Tripods with center posts that can point downward are very useful for outdoor macro work.
- Tripods with center posts that can be removed completely are quite useful to reach ground level.
- Ball head – inexpensive, easy to use and small.
- Things to consider
- Reflectors
- Reflectors are needed to add light to your subject.
- Reflectors can be purchased in many configurations (my preference are 12-24 inch collapsible disc reflectors (with diffusion screen built in).
- Reflectors are also easily home made. White cardboard, cardboard with tin foil, mirrors, etc
Additional Macro Equipment (not always needed, but can be very useful)
- Air blower – to clean equipment and/or move dust and particles from small objects.
- Brush – small watercolor paint brush will work well, for manipulating your subject environment.
- Building Blocks – use for supporting, lifting, leaning subjects.
- Cable Release or Remote Shutter – to reduce camera shake.
- Clamps and Alligator clips – super useful for arranging and manipulating your subject. (I recommend highly, the “Plamp II”). $45 and a great tool.
- Kabob Skewers – use as posts in the ground to attach clips.
- Flash brackets – to mount external speed-lights and/or LED lights.
- Speed-light – you can “freeze” motion with speed-lights, and they add much more light than reflectors.
- Trigger – if you use speed-lights you will need either a wired or preferably a wireless trigger system.
- Focus Rail – allows you to make very refined changes to focus.
- Hand Mirror (woman’s vanity mirror) – direct strong light to a specific point.
- Modeling Clay – very useful for arranging objects.
- Tweezers – useful for manipulating your subjects.
- UV filter – your lens gets very close to objects, so you may wish to protect it.
- Ground Spike – Can be purchased, but much cheaper to make. (Use a camping tent spike and epoxy a tripod thread to the top. Now you can mount a speed-light firmly in the ground near your subject.
Interested in Macro Photography Workshops in Colorado?
[Denver Area Macro Photography Workshop]
#macro #macrophotography #macrophoto #equipment #macroequipment